How to Connect Your Devices to tigerWIFI
Welcome to the tigerWIFI Connection Guide! Whether you're in a classroom, library, or anywhere on campus, connecting to the tigerWIFI network is fast and easy. Follow these simple steps to get your devices online and stay connected to all the resources you need. Let’s get started!
Connection Guides
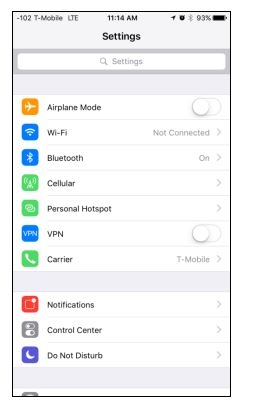
1. On your iPhone or iPad, tap on Settings.

2. At the top of the screen, tap on Wi-Fi.
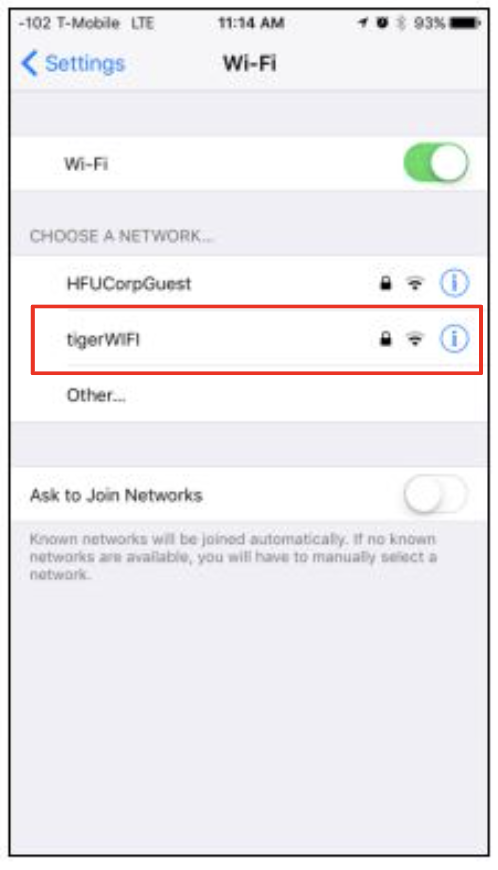
3. Make sure "Wi-Fi" is toggled on. Tap on "tigerWiFi".
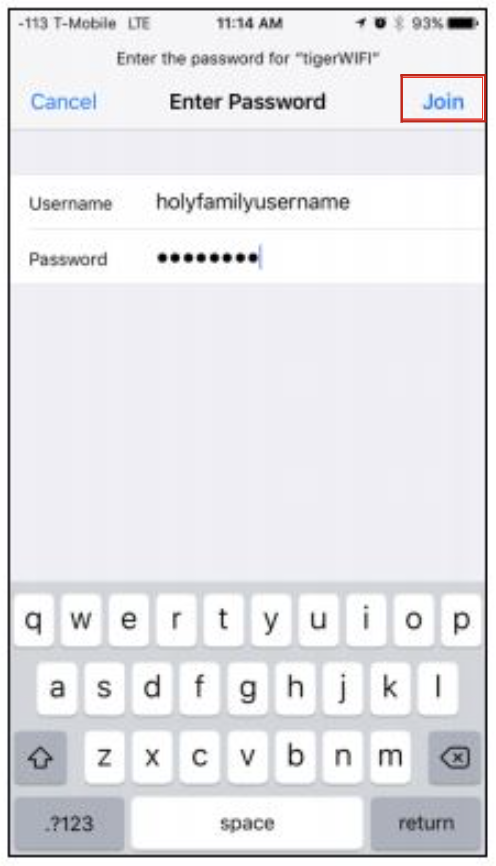
4. Enter your Holy Family username (without @holyfamily.edu) and your password.
5. Tap on "Trust" to continue.

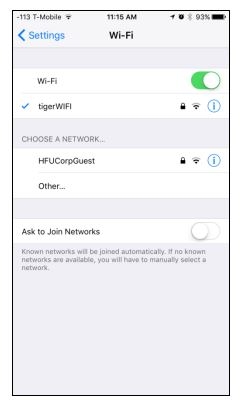
6. A checkmark next to tigerWiFi indicates that you are connected and ready to use the tigerWiFi.
The steps required to connect an Android device to tigerWIFI differ slightly based on the type of device and the version of the Android operating system. The following screenshots were captured on Android 8.1 (Oreo), but generally apply to recent versions of Android on any device.
1. Tap the Settings icon ![]() on your device. If you can't find the settings icon, consult your device's user manual for directions.
on your device. If you can't find the settings icon, consult your device's user manual for directions.
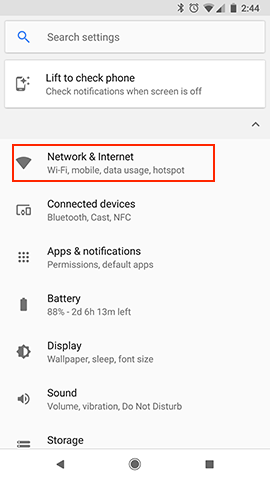
2. Tap Network & Internet and then tap Wi-Fi. If Network & Internet is not an available option, you may have an older version of Android. Instead, look for the option labeled Wi-Fi and tap it to continue.
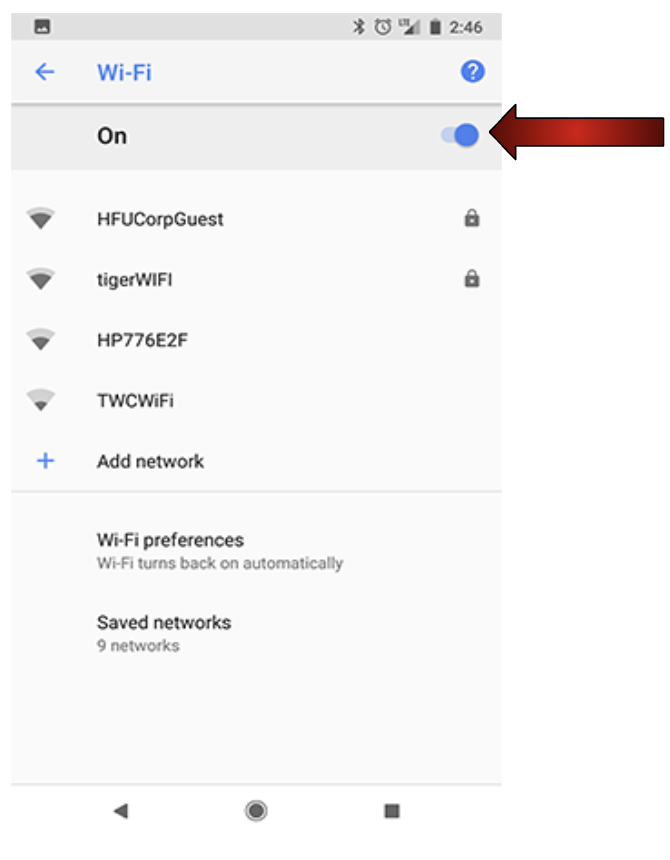
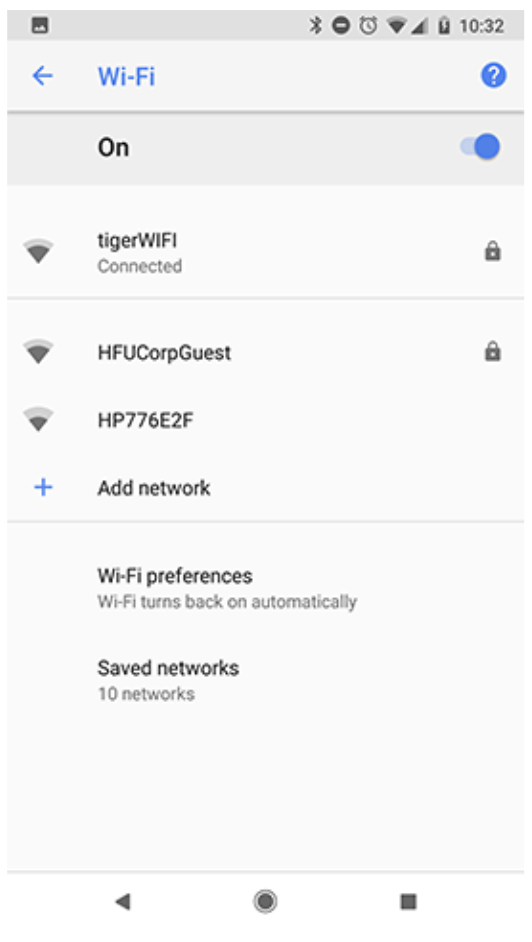
3. Ensure the switch button next to Wi-Fi is in the On position. Your device will automatically list tigerWIFI as an available Wifi network. Tap on tigerWIFI to begin setting up your connection.
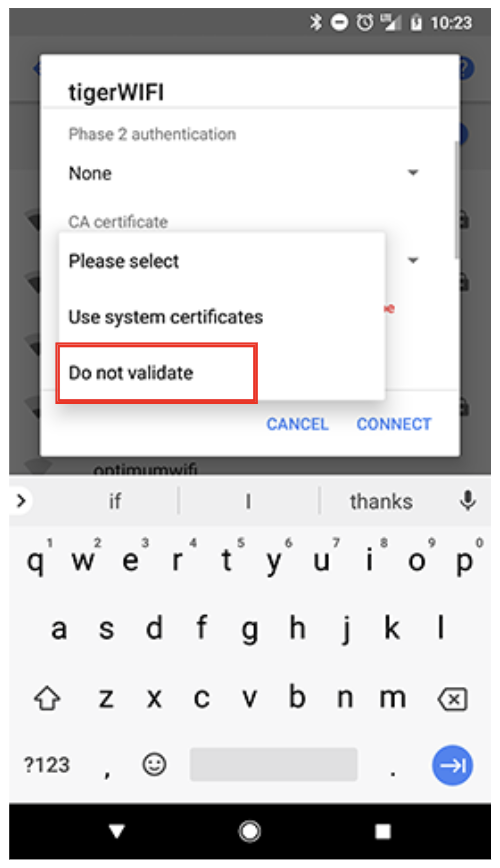
4. If prompted to choose a CA certificate, select Do not validate. If your version of Android already lists the CA certificate as Unspecified, you can skip this step.
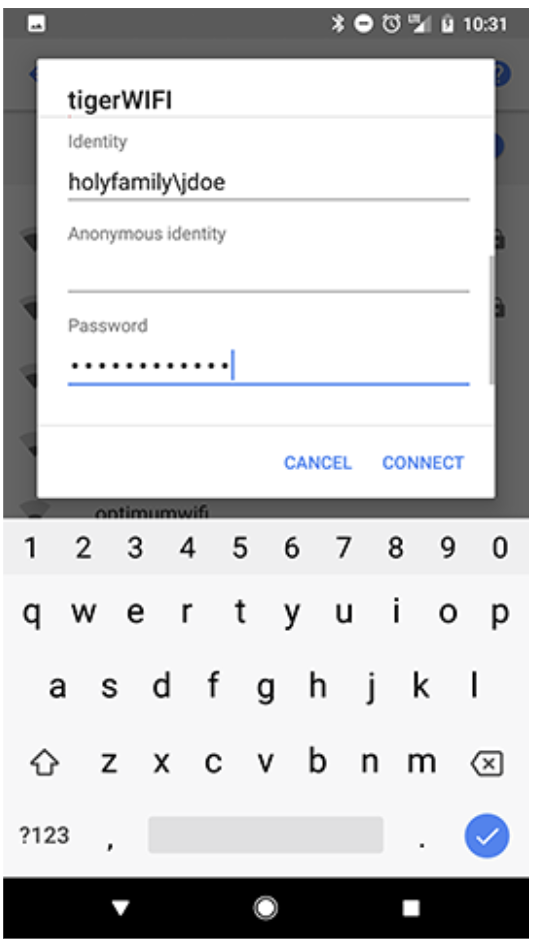
5. In the Identity field, enter holyfamily\ followed by your Holy Family username (without @holyfamily.edu). For example:holyfamily\jdoe. Note that the slash is a backslash (\), not a forward slash (/). Your version of Android, particularly older versions, may not require the holyfamily\ preceding your username. If your attempt to connect to tigerWiFi fails with holyfamily\ included, remove it and try again with just your username. Anonymous identity is not a field you are required to complete.
Your password is the same password you use to log into your Holy Family email account.
Tap Connect when you are finished.
6. TigerWIFI will be labeled as Connected in your list of WiFi networks.
1. Open the Network and Sharing Center. You can do this by:
- Right-clicking on the internet access icon on the bottom right of the screen in the toolbar.
- Another way is to type "network and sharing center" into the Windows run box located on the bottom left hand of the screen.
- Open up the control panel, click on "network and internet", click on"network and sharing center"
2. Click "Set up a new connection or network"
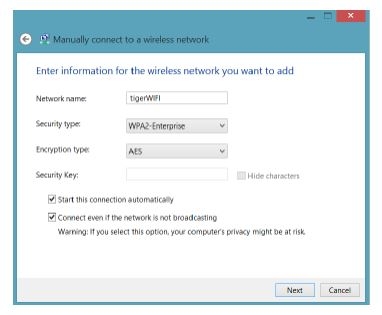
3. Click "Manually connect to a wireless network"
4. Enter the Network name (SSID) "tigerWIFI", and select WPA2-Enterprise, The Encryption type should be AES, and both check boxes should be enabled. Note: Leave the security key blank.
5. Click "Change Connection Settings"
6. Leave the connection tab as is. The options for connecting automatically and connecting even if the network is not broadcasting its name (SSID) should be enabled.
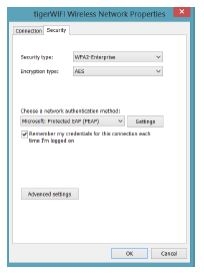
7. Click the Security tab. The security type should say WPA2-Enterprise, the Encryption type should be AES, and the authentication method should be 'Microsoft Protect EAP (PEAP)'. The option for 'Remember my credentials' should be clicked.
8. Click the settings button. Uncheck the 'Verify the server's identity' at the top.
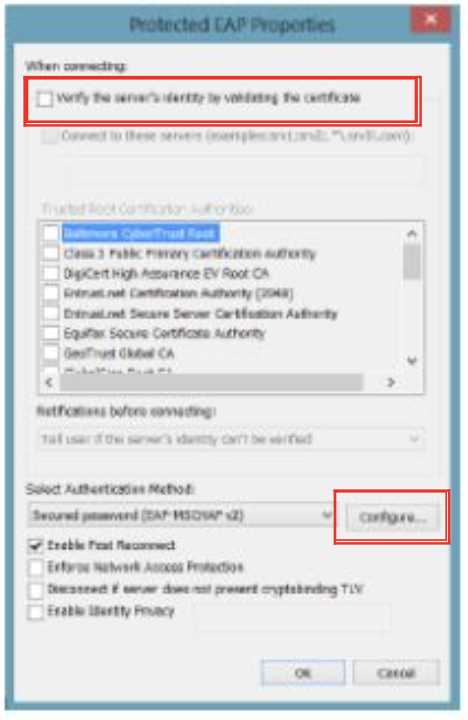
9. Then click the 'configure' button. Under there make sure the checkbox for Automatically Use My Windows logon name is not checked. Usually, Windows 7 will enable this, and Windows 8 will not. Make sure it's off.
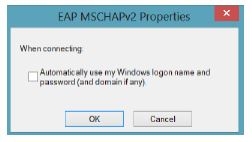
10. Click OK on the EAP MSCHAPv2 properties window.
11. Click OK on the PROTECTED EAP properties window.
12. You should be back on the tigerWIFI Wireless Network Properties. Click "Advanced Settings"
13. Enable "Specify authentication mode" and set it to "User Authentication"
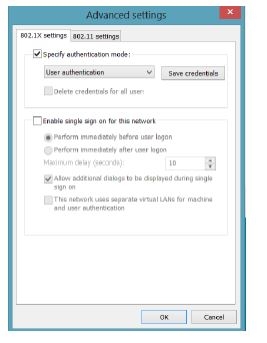
14. Click OK on the Advanced settings page.
15. Click OK on the tigerWIFI Wireless Network Properties.
16. Click CLOSE
17. Click on your wireless icon at the bottom right of your screen, and, if prompted, click connect. You will now type your credentials, and click OK.
18. Your connection should be complete and you should be ready to use tigerWIFI!!!
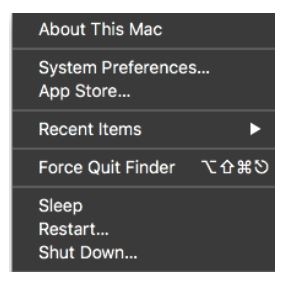
1. Open the "System Preferences". It can be reached through the following:
- At the top-left corner of the screen, click on the Apple logo and click on "System Preferences..."
- On your dock, click on the icon labeled "System Preferences."

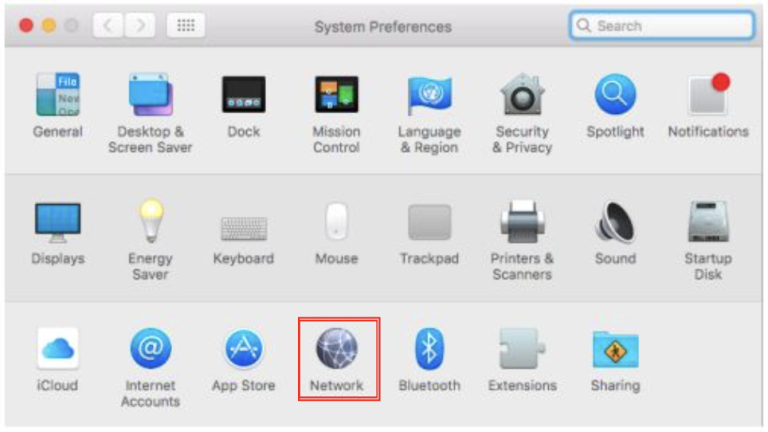
2. Click on "Network".
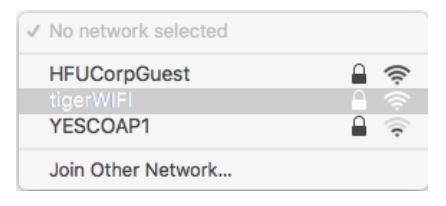
3. Click on "No network selected" under Network Name.
4. Click on "tigerWIFI".
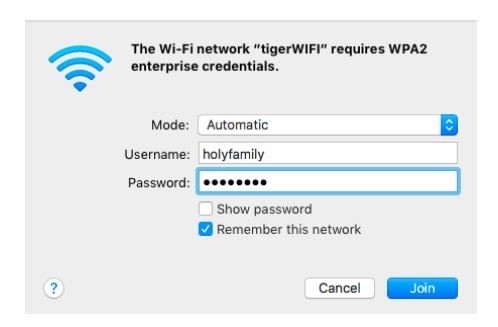
5. You will be prompted to enter your credentials. Enter your Holy Family username and password.
6. Make sure the Mode is set to "Automatic" and "Remember this Network" is checked. Click "Join" to continue.
7. You should now be connected and ready to use tigerWIFI!!!